TAD Revolution One / Part 1 - Cabinets
TAD Evolution One are by no means ultimate loudspeakers. They are damn good, though, and represent Andrew Jones´ golden era. I have been owning them since they were released in 2013 and have never felt any urge to replace them. Over the years not once did I listened to speakers that sounded great (by great I mean better sounding than the Evolution One), yet these were either too big for my room or too ugly for my taste. There were only two occasions when I was considering selling the TADs and getting a new pair of speakers.
TAD Revolution One / Part 1 – Cabinets
TAD Revolution One / Part 2 – Crossover
TAD Revolution One / Part 3 – Crossover parts
TAD Revolution One / Part 4 – Casework and fine-tuning
TAD Revolution One / Part 5 – Finale
YG Acoustics have launched their upgraded Sonja 3.2/3.3 models earlier this year and they have become the first real object of my desire. The YG epitomizes the best of all high-end worlds in my ears – they are true to source, livelier and more musical than Magico M3 (another shortlisted candidate), and beautifully engineered. Sound wise, the 3.2/3.3 are another remarkable step forward from the already fantastic Sonja 2.2i/2.3i. And then there is the new Marten Audio Mingus Septet, that was premiered at High End Munich Show 2023. Enveloping, comforting, sweet, yet incredibly detailed loudspeakers.

The problem is that the Sonja 3.2 is 130k€, and the Septet is 110k€; that is 4-5 times more expensive than the Evolution One (27k€ when new). And there was another factor that I was not willing to give up on: the fabulous TADs CST (Coherent Source Transducer). The CST in the Evolution One used the original 35mm beryllium dome embedded into a 140mm magnesium cone, before it shrank into the new “micro-CST-driver” with a 25mm beryllium dome and a 95mm cone of coming up models (Evolution One TX in 2019, and Grand Evolution One in 2023, whose price has gone up to 58k€ in the meanwhile).
That said, weighing all pros and cons, I have decided to radically upgrade the Evolution One. By radically, I mean radically.
Dismantling the Evolution One
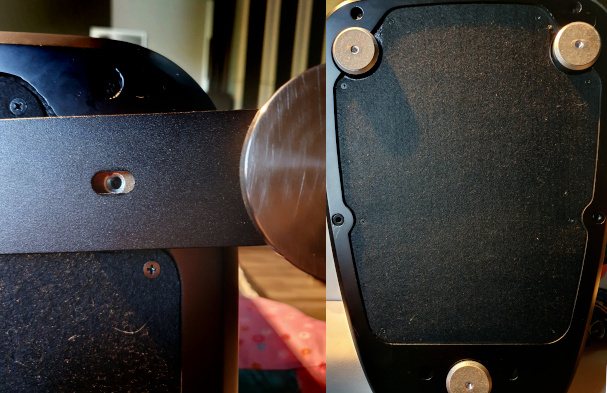
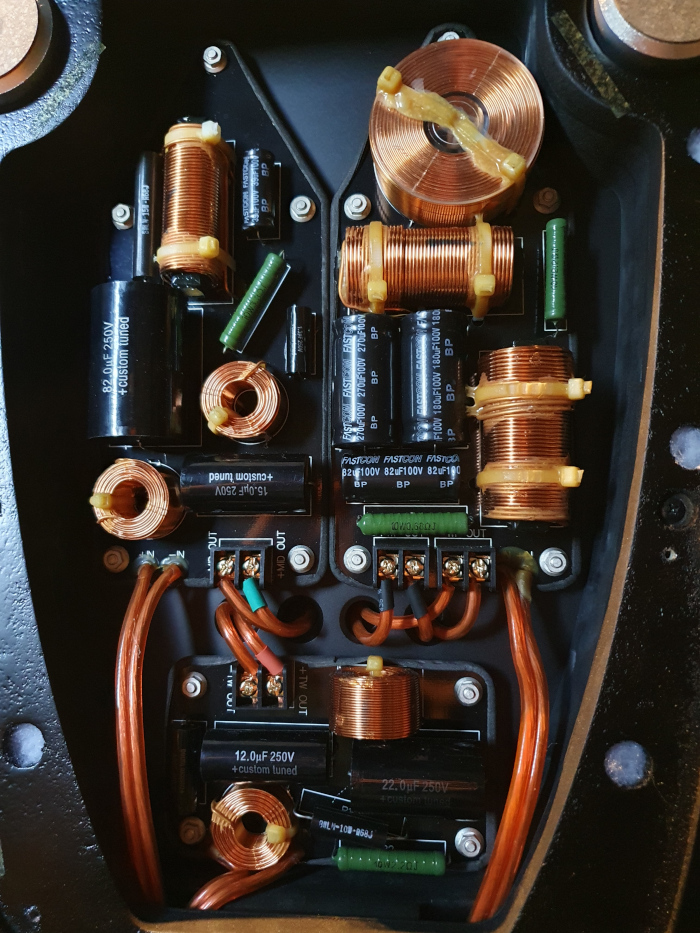
The speaker’s insides can be accessed by removing the drivers, and by removing the plinth that hosts the crossover. Throughout the dismantling process there was a lot to admire. The bottom part of the plinth is covered by a felt cut-out to prevent the crossover’s cavity act as a resonant chamber. The felt is both bolted and glued. The same method (bolts and double-sided adhesive tape) is used for other two HDF plinth ribs. The crossover does not use any superior parts, nor does it use inferior ones. For the asking price, the customer receives adequate quality, so no complaints here. It is good to see that each crossover circuit (tweeter, midrange, woofer) is on a physically separated board, so there is little mechanical coupling among the parts. A rubber damping material around the edges of the boards was another remarkable detail that attests the speaker builders’ attention to detail. I could not see the printed paths of the circuits, for the crossover boards are from two layers glued together, but it was not difficult to reverse-engineer the crossover topology. The internal wiring is no slouch either – this TAD uses 2.5mm2 (14 AWG) OFC copper leads.
The working plan was laid out this way:
- Step 1: Remove the crossovers and unnecessary parts from the cabinets.
- Step 2: Address the centre of gravity of the cabinets and the resonant points.
- Step 3: Improve the finish of the speakers.
- Step 4: Optimize the crossover design for perfect phase; the FR should be optimized for a target FR.
- Step 5: Rebuild crossover with better parts and make them external units.
- Step 6: Fine-tune voicing of the new TADs to the room (if needed).
Some steps must have been sequential, others could have been parallel. From all, the Step 1 was the easiest to do and the original crossovers were out in 20 minutes. After examination of the crossover parts, it was decided that none would be used for the now called “Revolution One” upgrade anyway, so they went to oblivion. Because there was no need to have binding posts on the speakers, I removed them too. Interestingly, these were TAD’s own design, machined from blocks of solid copper and gold-plated, each weighing as much as four WBTs.
The gravity points and resonances
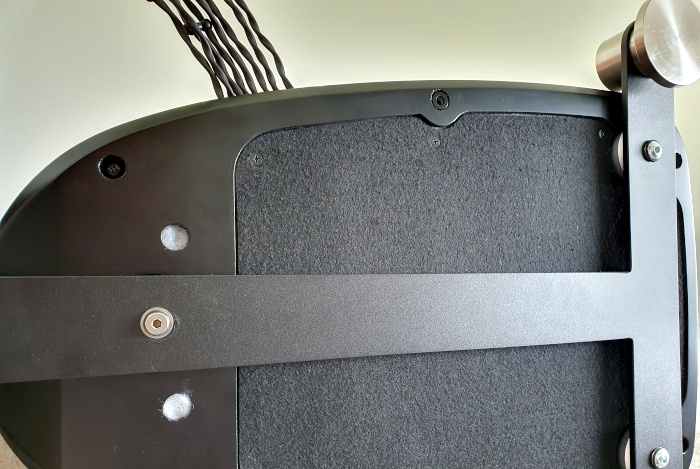
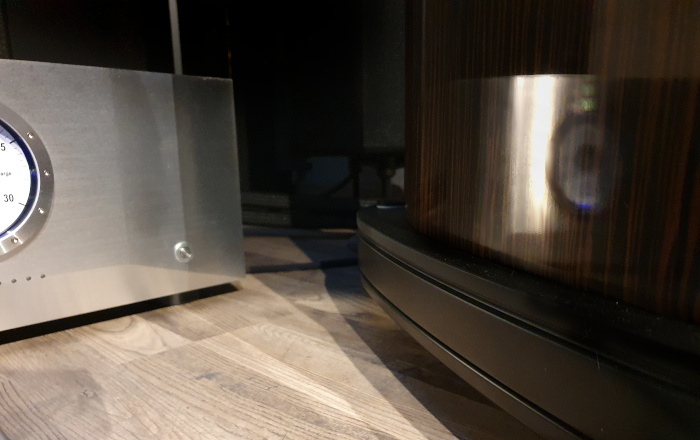
The TAD Evolution One is not particularly wide and with only three feet (mounted into the plinth) it is not particularly stable either. To prevent accidental knocking over, the manufacturer adds small feet that bolt into the outer edge of the plinth and are ‘activated’ only when the cabinet is pushed from side. The principle is similar to tricycle balance wheels. I have never used it like that and – once the speakers have been permanently placed in my room years ago – I have bolted a large T-shaped brace to each plinth to create outriggers that have added much more stability. After some experimentation with Nordost Sort Fut and Stillpoints, I have settled on Finite Elemente Cerabase under the TADs. I invite you to check the Audiodrom Reference Room article for more details.
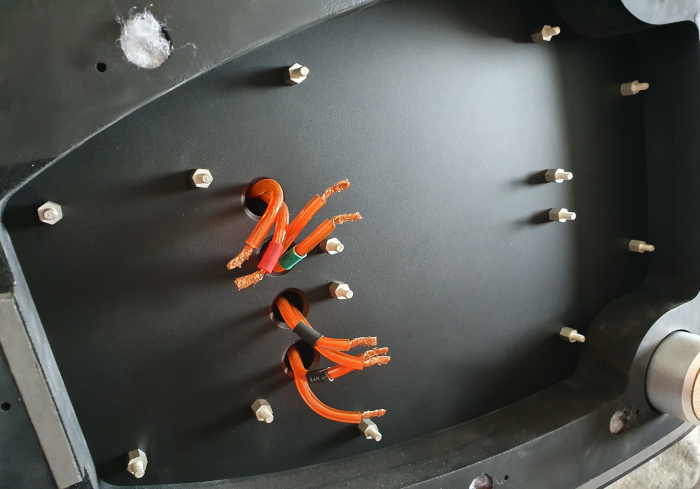
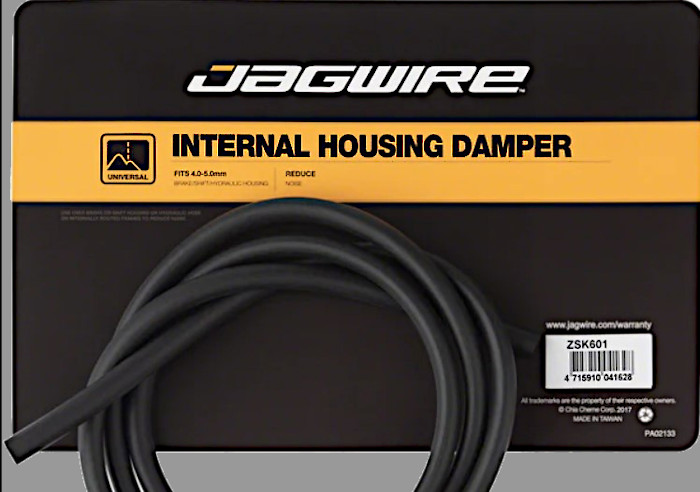
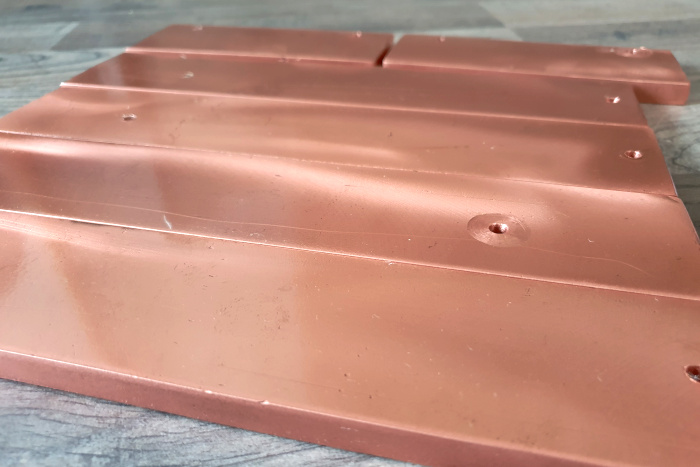
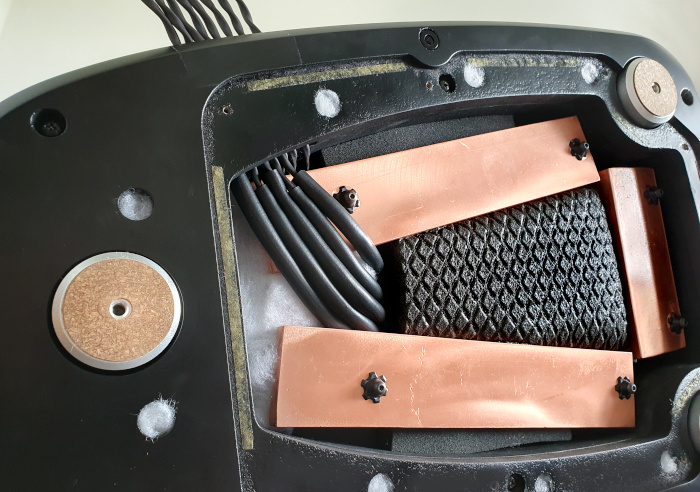
The original crossover was not particularly heavy, but it added some weight and stability at the lowest part of the speaker. Once the crossover was removed, the speaker’s centre of gravity moved higher to the area between the woofers where the big motors sit, and the TAD became less stable. It was time to fill the now empty crossover cavity with some extra weight. The copper has the advantage of excellent self-damping properties and is non-magnetic, so I used massive copper bars and damping automotive material, that were leftovers from another project. I cut the copper like butter with aluminium angle grinder blade and drilled threaded openings into the bars. To fasten the bars to the speaker I used the original holes with aluminium inserts that remained in the plinth after removing the original crossover boards. Before I did so, I tubed the internal wiring with Jagwire Housing Damper that is used in bike frames to prevent cable rattling – it fitted snug around the wires. Also, all metal-on-metal threads were secured by Loctite thread locker. If needed, only plastic washers were used. The cavities in between the plinth, cables, and copper bars were filled with Cellofoam acoustic foam. The whole assembly added around 3 copper kilograms low in each speaker’s base. That made the TADs impressively stable and did not add too much dead weight on the isolation feet.
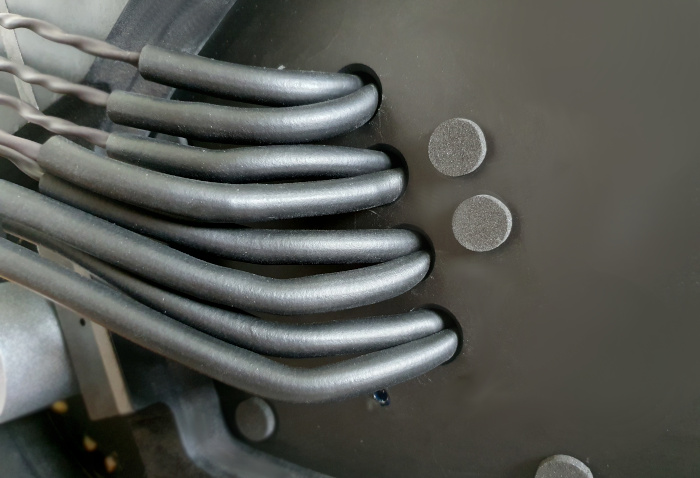
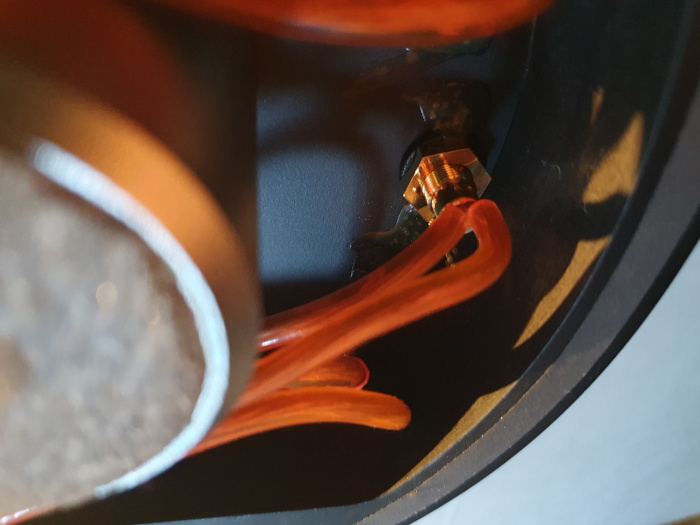
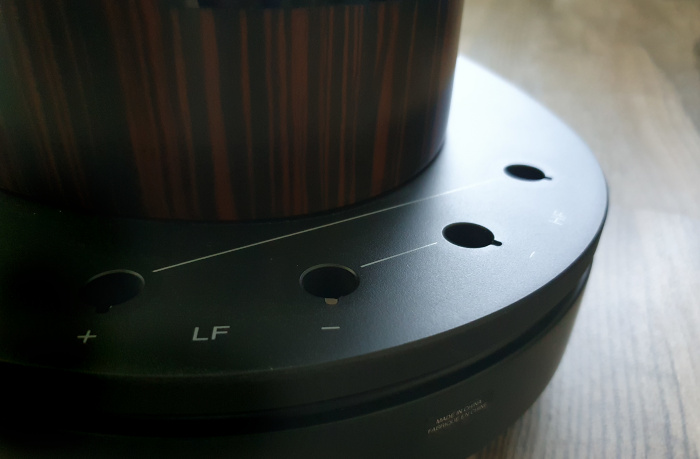
As the speakers must have been prepared for the external crossover, it was necessary to route the cables out of the speaker. I used silver-plated copper wires for the job. Later in the process the wires will be terminated with silver-on-copper hollow plugs to connect the crossover. To make the cable routing neat I decided to mill a channel in the plinth. At the same time, the channel was lined with a Franke plastic sealant (used for kitchen sinks). After the two parts of the plinth were bolted together, the sealant enrobed the cable leads and made sure that the wires did not touch each other, nor they touched the cabinets. The holes that remained after the speaker binding posts had been removed were filled with an absorbing material and capped by aluminium InAkustik washers, originally intended to be used under spikes. I liked the result, functionally and aesthetically.
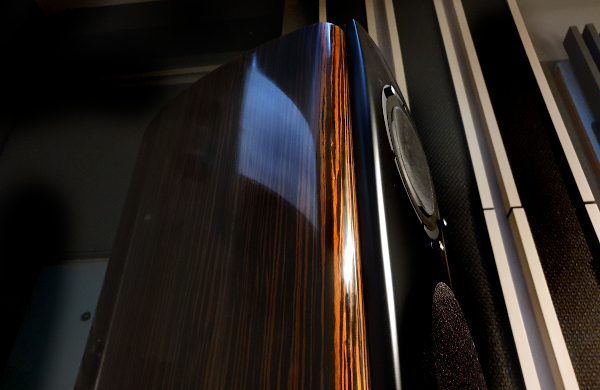
The mirror finish
I used the opportunity of the speakers being out of the listening room (and nice warm weather outside) and decided for a little cabinet makeover. The TADs come in macassar ebony veneer sealed in polyurethane matt. I’ve always liked the deep gloss finish (Emerald Black and Beryl Red) of TAD Reference One TX speakers that exude elegance and luxury. So why not to give the beautiful macassar veneer a makeover and add some depth to the finish?
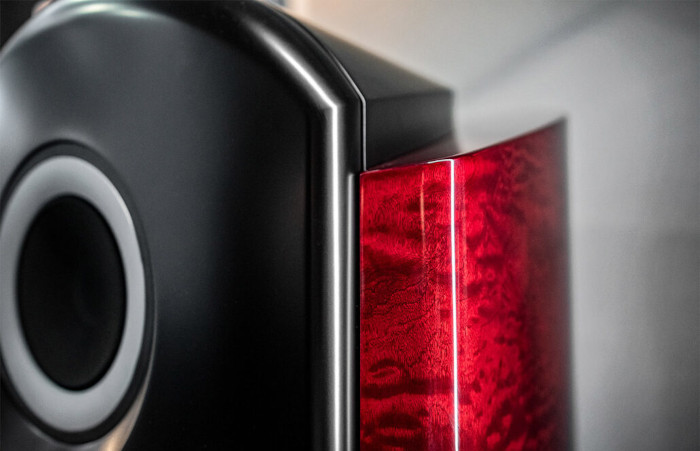
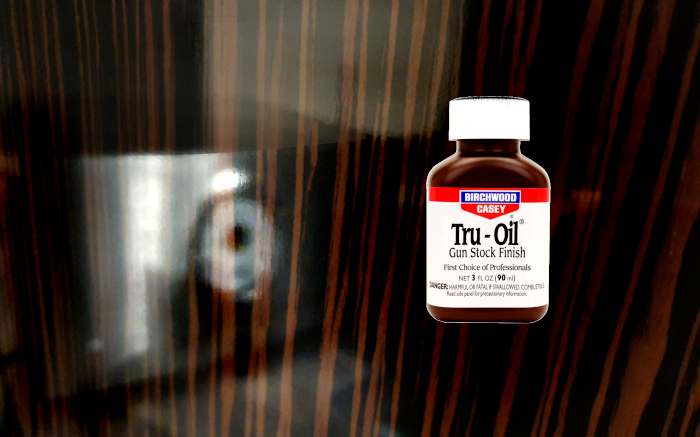
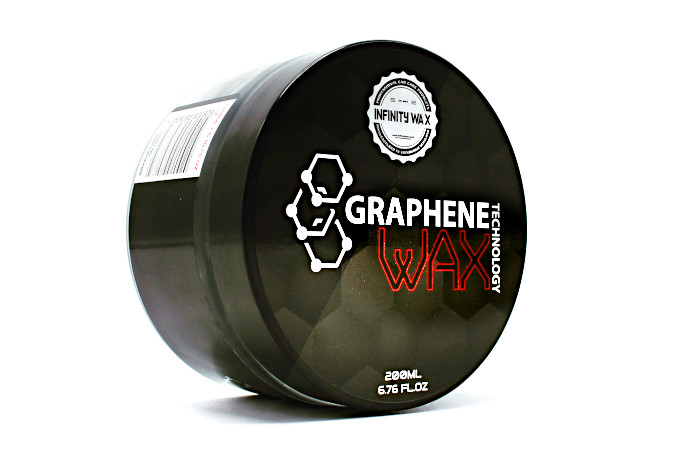
There was no need to remove the drivers or anything else; the whole process was a very clean job. Two years ago, I used Birchwood Casey Tru-Oil for impressive high-gloss results on a gun stock. The Tru-Oil is applied by a small lint-free piece of cloth, in very thin layers. It dries well, so 1-2 layers can be added every day. The goal is to rub in each coat as thin as possible and occasionally to sand down or buff in between the coats, as needed. Thus, layer by layer, the depth is built. This way Tru-Oil does not leave any brush marks or drops that often happen during a standard painting job, neither any spraying equipment is needed. In fact, the whole process can be accomplished in comfort of a living room. I built up about 9 layers in 10 days, and hand-polished them with a micro-detailing car polish. The final mirror has been achieved by Infinity Graphene wax. This completed my work on the speakers, and they returned to the listening room.
The next step was to re-construct the crossover and truly transform the Evolution One into the TAD Revolution One. As the goal was to squeeze every drop out of the TADs, I engaged three important names in the project: Silent Laboratories, Duelund Coherent Audio, and AAI.
To be continued...
TAD Revolution One / Part 1 – Cabinets
TAD Revolution One / Part 2 – Crossover
TAD Revolution One / Part 3 – Crossover parts
TAD Revolution One / Part 4 – Casework and fine-tuning
TAD Revolution One / Part 5 – Finale
(C) Audiodrom 2024


