TAD Revolution One / Part 3 - crossover parts
Moving from paper to soldering iron was a very exciting step in the project. Finally, all the hard work will materialize in the listening room, right? Well, almost. Unless someone provides you with a complete construction kit that was tested and tuned to perfection, there is still a lot to be done. It starts with a nightmare – which exact components to use?
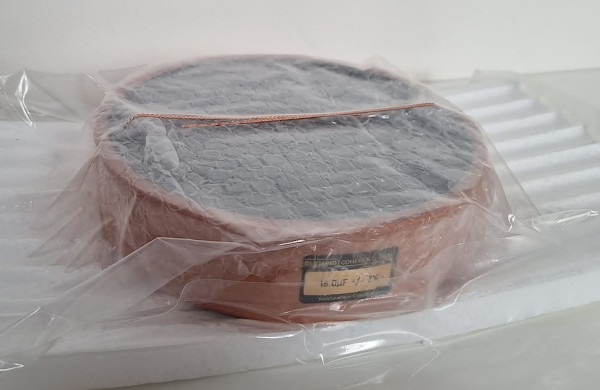
The Duelund CAST 16uF capacitor, 181mm in diameter, 45mm in height.
TAD Revolution One / Part 1 – Cabinets
TAD Revolution One / Part 2 – Crossover
TAD Revolution One / Part 3 – Crossover parts
TAD Revolution One / Part 4 – Fine-tuning and casework
TAD Revolution One / Part 5 – Finale
"No one can design a speaker´s crossover by using driver data alone and by software simulation."
Let this quote sink in. But wait, this is not to say that simulations are useless, they are the indispensable first of many steps required to properly design speakers/crossovers. Without them, just using erudition and a hit and miss method like our speaker building ancestors used, one needs a lot of luck and reiterations to get the desired result. If you know what to measure, the process can be much more efficient, no doubt about that.
On the other hand, the ear can be much more discriminative than measurements and listening tests are another indispensable step to find out whether everything works as good as on the screen. One easy example: two coils, same inductance, same resistance, same measurements, different sound. The necessity to use the ear as an arbiter is acknowledged by Silent Laboratories too. As Jan Mixa puts it “In the design process, the first no-matter-how-well-simulated crossover almost always sounds unsatisfactory”. The fine-tuning to satisfaction may involve adjusting values of the parts and/or the crossover topology, as well as just swapping component brands. Let me be clear: like it or not, the parts have their own fingerprint on sound and using one brand in place of the other (or using a part from a different range of the same manufacturer) can transform the sound remarkably.
Setbacks
What’s worse, seemingly minor components can have a big effect in the overall sound quality of the speaker. But how to find which parts to choose? A nice and short but entirely vague answer is: Choose the best. How can someone tell me what’s the best for me? The final goal and evaluation process is very subjective and are no tools or methods to objectivize it. In the project like TAD Revolution One, it also means that the opinion of the manufacturer (or the implementor) must be taken with a pinch of salt. The listener’s preferences matter.
It became clear very soon in the process that there were 5 important challenges:
- No way I could listen to all the different coils, capacitors, and resistors that are available. Even if I narrowed the search significantly, there were way too many combinations. It would take too much time (roughly 2-3 years) and too much money (tens of thousands of euros) to go through the preselected options.
- No way I could get serious guidance about how this or that component from this or that manufacturer would sound in my implementation. There are some subjective evaluations available, especially on capacitors (Troels Gravesen, Eric's Hi-Fi Blog, Humble Homemade Hifi, and Jeff Day´s Duelund journey to name a few), and despite they are great material to start with, they are applicable to particular applications, particular preferences, and particular commercial interests, and as such they should not be overrated.
- The way the components are organized in the crossover (mutual orientation and distances) is not less important than the components themselves.
- The way the components are connected and wired is not less important than the components themselves.
- Not all components are produced in the values that are needed. Even those that are, are not the stock values. Thus, almost everything must have been made to specifications and production lead times were counted in months rather than weeks.
I started by looking around to see what the loudspeakers with the sound I like are using in their crossovers. I did due diligence on Magico, Tidal, Marten, Raidho, Børresen, Gauder, and YG, as well as on some others. To my surprise, I was not able to find anything like “an ultimate crossover”; the parts that one finds in high-end speakers are usually a mix of good standard components with several top end parts added for better performance (and for better promotion). It is not because the producers are trying to save money (although it plays role too), but mostly due to space limitations in the speaker cabinet. As you will see further in this article, the size of each TAD Revolution One crossover exceeds the size of A-class monoblock amplifier.
There were three names reappearing on the list of parts repeatedly and they pretty much summarize what’s available in the top echelon: Mundorf, Jantzen, and Duelund, with some Clarity Caps thrown in here and there. I wanted to see these names being the part of the TAD Revolution One crossovers. And I also had the idea about which wires I would like to employ in the project. Let me take you through my journey.
Coils
The TAD’s original crossover uses single wire ferrite core coils that – apart from they use good gauge wire – are very basic. At one of the earliest phases of the new crossover tests, the original coils were replaced with Jantzen wax coils. The wax coil is a top-of-line foil inductor that uses thin copper foil wound in layers in special paper and then the whole coil is impregnated and baked with a unique paraffin wax. The purpose of the wax is to insulate and seal the coil against micro-resonances that occur in every inductor. Jantzen claims that the paraffin wax is superior to natural waxes (like beeswax) for it ensures that there are no air-pockets trapped in the wax and has a higher temperature tolerance. The thickness of the foil influences both the resistance of the coil and the power handling of the coil.
When we replaced the original coils with the wax coils, it was clear there was no way back. The sound got fuller, it acquired a completely different level of dynamic headroom, and it became more liquid, more musical, and much more detailed at the same time. All positives, no trade-offs whatsoever. Interestingly, in our first Revolution One crossover iteration, Jan Mixa of Silent Laboratories used many daisy-chained wax coils (see the photo below). The reason for that was simple – to order one coil of a proper value just for tests (with a risk of needing a different value afterwards) would mean to wait for a month and spend money that may have been wasted. The result of excellent, nonetheless. Because the daisy-chained coils had higher resistance that we needed, we wanted to test the exact value. So, we ordered core coils that were 10x cheaper than wax coils, just for the sake of testing. They ruined the sound so much that we were not able to discern the difference between the inductance values. Off they went.
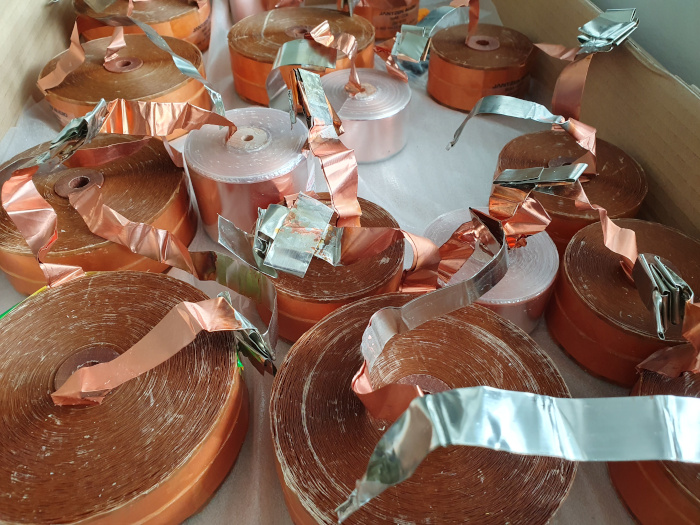
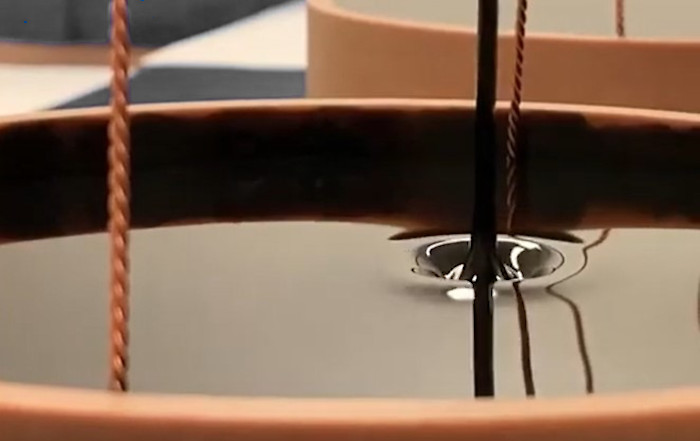
The train of coils. The daisy-chained Jantzen Wax Coils (with some Mundorf Aircore Copperfoil/Polypropylene thrown in as we did not have enough parts from Jantzen). For the listening tests the coils were rearranged to minimize their interaction.
Duelund Coherent Audio makes fantastic WAX/PIO inductors that are made of foils that are wound onto a compressed paper former with the foils insulated by waxed or oiled paper. Finally, the inductors are impregnated under high pressure in what Duelund calls a CAST process and sealed in compressed paper rings. The Duelund coils have great damping properties and thermal stability, unfortunately they are not available in the resistance values that we needed as Duelund uses thinner foils. To put it in the perspective, we needed 8.2mH and 6.8mH inductance in 8AWG. Therefore, we ordered the final coils from Jantzen.
Capacitors
After spending (maybe too many) hours studying the “sound” of capacitors from multiple internet sources, I settled on the following list of alternatives:
- Duelund capacitors, namely CAST PIO Ag, CAST PIO Cu/Ag, and CAST PIO Cu
- Mundorf Supreme Evo Oil, namely Silver and SilverGold
- Jantzen capacitors, namely Amber Z-Caps and Alumen Z-Caps
We reached out to the manufacturers for non-standard values and to some resellers (Germany, Poland, Finland, Denmark) for standard values. Without beating around the bush, this is my experience:
Duelund Coherent Audio https://www.duelundaudio.com - super helpful, available for consultations, and ready to make virtually any capacitor to our exact specifications. The parts are available direct from Duelund (with certain minimum order limitations) or from their distributor Andersen Audio.
Mundorf https://www.mundorf.com – outside their established contracts, they don’t care; choose from their stock and if you are lucky, they deliver. If not, backorders can take anything from 1 month to 2 years, without any guarantee. Although I understand their business model, I share their resellers’ concern about reliability in lead times and shipping.
Jantzen Audio https://www.jantzen-audio.com – super helpful, unfortunately stock values of their high-end capacitors end with 11uF as maximum and thus can be only used for tweeters (for the same reason we ruled out Miflex, which seemed to be an interesting option too).
So, in the end, I spent a couple of weeks in phone exchanges with Frederik Carøe of Duelund Coherent Audio. And I am happy that I did.
Alike coils, the Duelund CAST capacitors use pure metal foil (of your choice) wound with paper, then the foil is put under vacuum pressure in an oil tank at high temperature, so the structure gets permeated by oil. Everything is done to exact specifications and Duelund grants tight +/-2% tolerances. This is extremely important – in case the part values deviate from specified ones, these offsets add up and your crossover ends up out of tune and you are forced compensate it elsewhere or with more parts.
Jan of Silent Laboratories came up with an idea to split large capacitor values into smaller ones. By distributing discharging speed over a wider spectrum of values we would get, in theory, optimized transient and dynamic behaviour. In practice it means to split 20uf into exponential series of 15uF+3uF+1.5uF+0.5uF, for instance. Frederik confirmed that this could be the way forward, but only if we were ready to build crossovers of the size of a refrigerator and were ready to accept extra leads and soldering (thus imperfections) in the signal path. Instead, he suggested to use exact values that were needed and experiment with bypass capacitors to facilitate transient behaviour. Even there he was not black and white, saying that “there is no ‘best’ in the Duelund assortment, and each component needs to be tested in the application to hear whether it fits or not, be it copper or silver”.
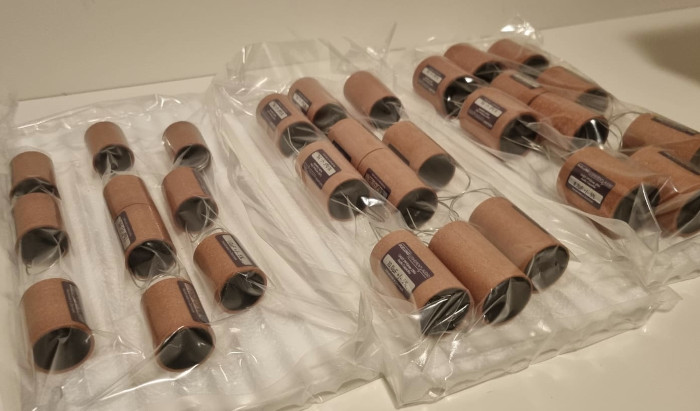
If you expect a big capacitor shoot-out, I will disappoint you. As outlined, no way we could do that in reasonable time for reasonable money. After considering the options, we decided to go full-Duelund and ordered a mix of CAST WPIO Cu, CAST Cu, CAST Pure Silver, CAST Cu/Sn and CAST PP Silver Hybrid capacitors for all positions of the Revolution One crossover. It took Duelund Coherent Audio two months to produce the specified values as there was a delay in impregnation material from their supplier during Xmas time. One January morning all the boxes arrived.
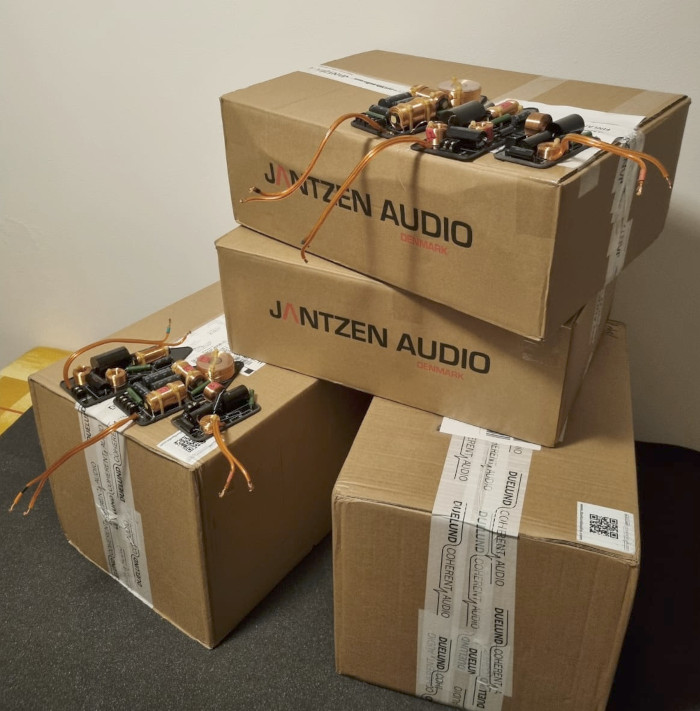
The boxes just landed. Although there is some wrapping foil inside them too, it gives an idea about what we ordered to replace the TAD’s original crossovers that are seen in the picture. Although we had all the dimensions upfront, when I saw the boxes I started to worry whether there was enough room in the listening room for the new crossovers.
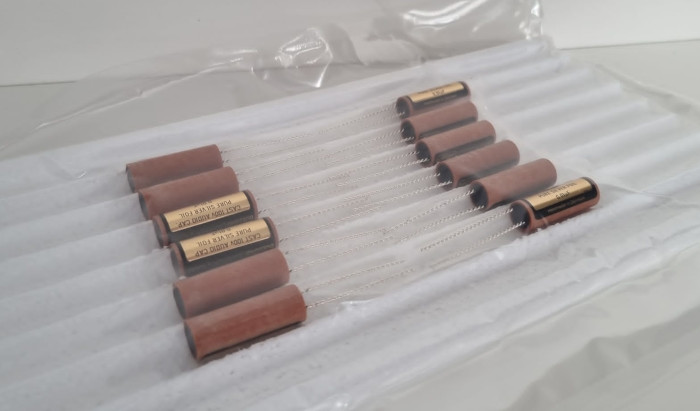
Duelund parts, immaculately manufactured and wrapped. Yes, they are expensive, but they are made like pieces of jewellery. My heart was bleeding when the soldering iron touched them.
The Duelund CAST PP Silver Hybrids were babies compared to their big brothers. They already have bypass capacitors built in. They are a great compromise if you need a high value capacitor and do not want to have a capacitor size of a wedding cake.
CAST Pure Silver Bypasses, 0.01uF each. They can be attached in parallel to any capacitor to boost its performance. Don’t take the latter for granted – take your time, experiment, and be surprised.
After the CAST process is finalized, the structure is placed in a compressed paper ring and sealed with a special lacquer to become inert to air humidity. Feel free to check Jeff Day’s series of articles available on Duelund’s website (https://www.duelundaudio.com/en-us/jeff-day/) to find more details. It is quite unique that Duelund preserves the material integrity to the very tip of hook-up wires – if the capacitor is Pure Silver, the leads are pure silver; if it is Cu/Sn, the leads are Cu/Sn, and so on.
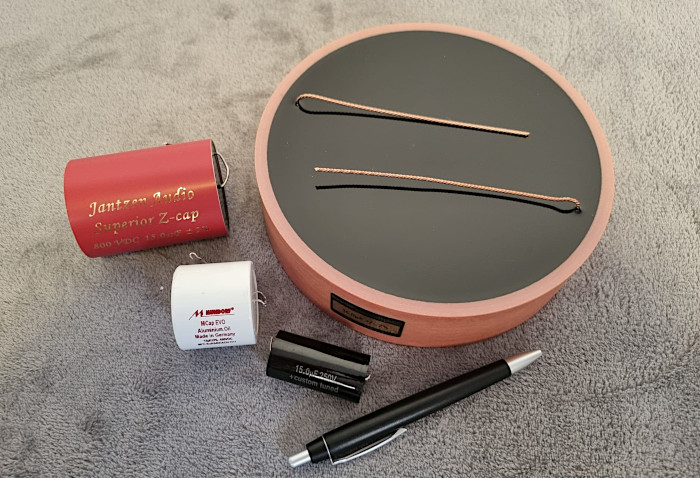
Relative sizes, left to right (all 15uF): Jantzen Superior Z-Cap, Mundorf MCap Evo Aluminium, original TAD’s custom tuned capacitor, Duelund CAST.
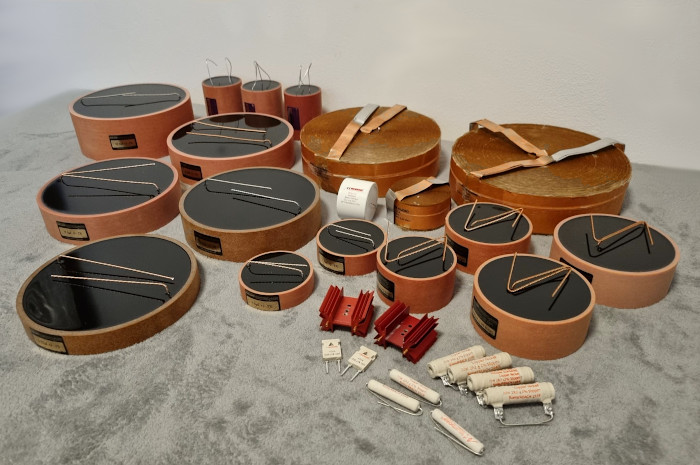
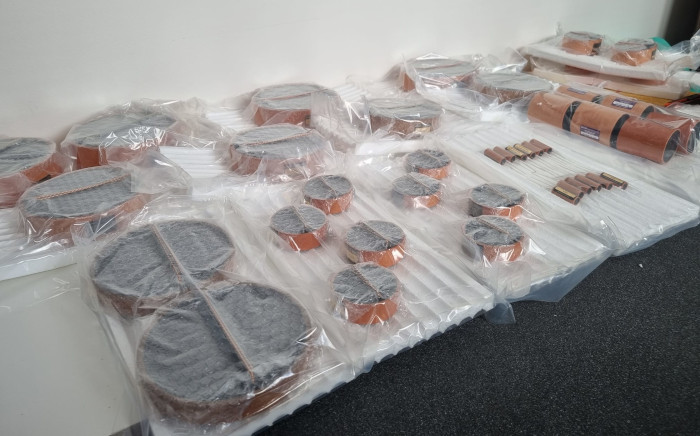
The parts for the Revolution One crossover prototype. The picture shows just one crossover. Please note the final Jantzen Wax Coils, 220mm and 210mm in diameter. The Mundorf MResist Ultra resistors were not used in the prototype, one single MCap Evo was.
Resistors
We decided not to be picky about resistors for the time being. The goal was to get rid of as many resistors as possible from the signal path, and we were ready to sacrifice some imperfections in frequency response for it. It proved to be a winning strategy. For instance, decreasing the value of the resistor in the midrange crossover made mids more prominent than needed and this extra forwardness was perceived as slight nuisance during longer listening sessions. When the resistor was removed entirely, the mids between 400-700Hz got boosted by 1.5dB; intuitively, it should have result into a disbalance. However, the elimination of the resistor removed the electric haze and introduced such a remarkable level of purity into the midrange, that the small boost was not a problem at all. Similar findings were made in the tweeter section: the purer and the better phase-aligned the highs were, the less everything else mattered.
So, for the Revolution One prototype, we used a mix of resistors that were on hand, mostly Mundorf MResist Supreme, and decided to fine-tune later in the process with candidates from Path Audio, Mundorf, Duelund, and Lefson.
Wires
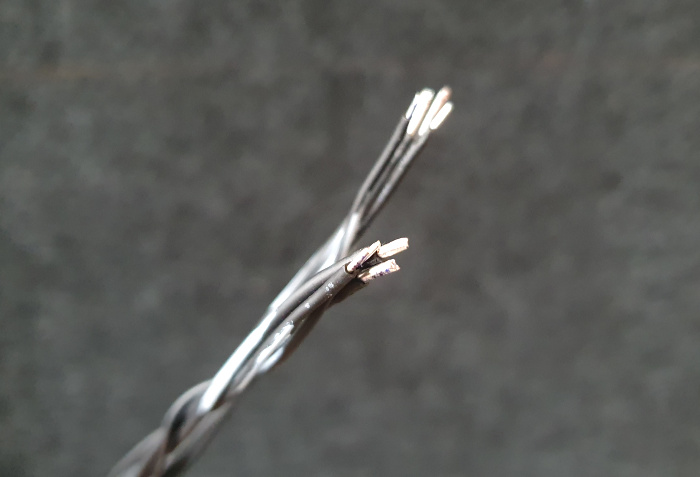
The AAI wires, loosely twisted bundle, each conductor treated with their IST technology (the latest Estremo generation). Two pairs of different gauges were used in each bundle.
As far as the wires were concerned, I wanted to see Authentic Audio Image alias AAI silver solid core wires throughout the crossover. Not because the wires they use are special as such, but because their proprietary Interference Suppression Technology (IST) transforms them into something truly remarkable, which surpasses what most other brands can achieve. I am a happy user of their power cable, interconnect, NSA power cable, and isolation pads; not because they are the world’s best (what is?) but because they sound real and natural.
AAI uses 0.7mm, 1.2mm, and 2.0mm wires. For we needed to build larger cross-section areas, we needed to combine more of them in bundles. This resulted in ordering of 68 individual lengths of wires. AAI did not recommend braiding the wires, but running longer leads in parallel (e.g. to the binding posts) would not be a good idea either. So, after some consultations, we decided to twist the wires just slightly knowing, that we could always make the twisting tighter or looser as needed. There were two inevitable trade-offs for using the AAI wires: they are strictly directional, and we had to decide how to maintain their directionality throughout the crossover, which was more difficult than you may think, and I will discuss it in the next part of this journey. Also, they are very stiff when bundled - they are solid core, remember. Crimping and soldering them to terminals was a chore that Jan of Silent Laboratories was not excited about, but he found the way how to do it without losing temper and fingers.
Binding posts
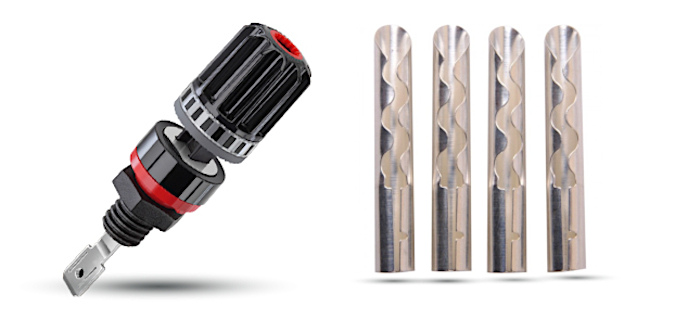
For the binding posts, WBT Nextgen 0708 Ag were used. They use pure silver signal conductors in the geometry that prevents eddy currents and eliminates nonlinear distortions, and accept banana plugs, spades, and crimped cable ends up to 6mm²/11AWG. The Nextgen technology restricts the presence of metal to as low metal mass as possible to prevent the mass storage effect that – according to WBT - has a measurable influence on audio quality.
From previous projects, I had a very good experience with Elecaudio Beryllium Copper Silver Plated BA-30S banana plugs. By the “good experience” I mean they were invisible to sound and made no harm (unlike some other supposedly more high-endish terminations) so we used them between the loudspeaker and the crossover. This also contributed to the nice and neat layout of the casework, as you will see later.
Warming up for the finale
The guys in Silent Laboratories build ultimate crossovers which – among other things – means a ban to PCBs, long signal paths, and thin wires. All the crossover components are interconnected with as short leads as possible, cold-welded with pressure, and only then secured by silver soldering.
Both the Duelund capacitors and the Jantzen coils have long leads. Despite the size of the crossover, we were able to avoid adding extra wires and could interconnect the parts directly (even there the unnecessary lengths of wires were cut off to shorten the paths). Of course, we had to run wires to the speaker cable binding posts. If more than one part was connected to such a wire, Jan used a continuous wire, removed its insulation where the part should have been, the part was attached, and the wire continued to another part without interruptions. This way we eliminated any possible transition effects.
Once the whole crossover was assembled and burnt-in (it got a week of torture on a cable cooking machine and ca 250 hours of music before critical listening tests), we experimented with the relative placement of the parts, their decoupling from the provisional board they were placed on, and tried to adjust the ideal values of some of them, especially in the woofer part, to see how the sound can be further shaped. We also tested Duelund Pure Silver Bypass Capacitors on every single position of the crossover to hear and evaluate their effect. All the above showed there were still too many degrees of freedom, so we decided to build the final cases first and only then fine-tune. I was surprised at how those incredibly small and seemingly unimportant details mattered in the end.
To be continued...
Useful contacts:
Silent Laboratories – Jan Mixa, +420 777 772 642
Authentic Audio Image - AAI - +421 905 694 943
TAD Revolution One / Part 1 – Cabinets
TAD Revolution One / Part 2 – Crossover
TAD Revolution One / Part 3 – Crossover parts
TAD Revolution One / Part 4 – Fine-tuning and casework
TAD Revolution One / Part 5 – Finale
(C) Audiodrom 2024